Slic3r: a free and open-source slicer
Among the many different 3D printing software available, slicer, or slicing software, serves as an intermediary between your 3D model and the 3D printer. More precisely, the slicer cuts a 3D model into a succession of layers that will be 3D printed by the machine. The instructions to print these layers are converted into a special language called G-code, which a 3D printer can follow. On the market, numerous slicers are available, and cater to various levels of experience in additive manufacturing. Today, we will take a closer look at a well-known slicing solution: Slic3r.
Slic3r is open-source software that is independent of commercial companies or printer manufacturers. It works with CAD files (.STL or .OBJ) to generate the G-code for the 3D printer. It was launched in 2011 within the RepRap community and is a non-profit project, so it can be downloaded for free. It is already being used by tens of thousands of people worldwide. The software is known to add features that have been discussed and approved by the community. Since its creation, the Slic3r software has been released in 48 official versions. However, the open-source software hasn’t been updated in the last two years, thus the latest version is version 1.3, released in 2018. All previous versions have been archived on the official website.

Photo Credit: Slic3r
First Step
To use the software, you must first download it from the official website or via Github. Pre-compiled versions are available for Windows, Mac OS X and Linux. Windows users can choose between 32 and 64 bit versions adapted to their system. After downloading, all you need to do is install Slic3r. Before the first printout, it is necessary that your 3D printer is correctly calibrated, as the software and ultimately the print quality depends on it. If, for example, the extrusion speed is not set correctly, the machine will not produce the amount of filament that has been determined, ultimately resulting in 3D printing mistakes.
Slic3r Configuration
For the manufacturing process to work optimally, not only must the 3D printer be correctly calibrated, the configuration parameters must also be correct. Below you will find an overview of the various configuration parameters.
Print Settings
We first deal with the general configuration of the print, which consists of the height of the layer and the perimeters. The layer height represents the thickness of each extruded layer and is influenced by the desired resolution and printing speed. In general, it can be said that a lower layer height results in better print quality. However, the smaller the layer, the longer the printing time. The perimeters are the limits of each layer. It can be a fixed value for all layers or follow a more adaptive algorithm.
3D printing settings
You will also be able to choose the infill parameters, i.e. material used inside the model. The infill also serves as a support for the surfaces. Slic3r usually adds it automatically, but there are different infill patterns and other parameters to choose from. These affect, for example, the printing speed and strength of the printed template. There are also options related to the support, which ensures that the protruding parts of the model are well supported. These are generated automatically, but the density can be determined.
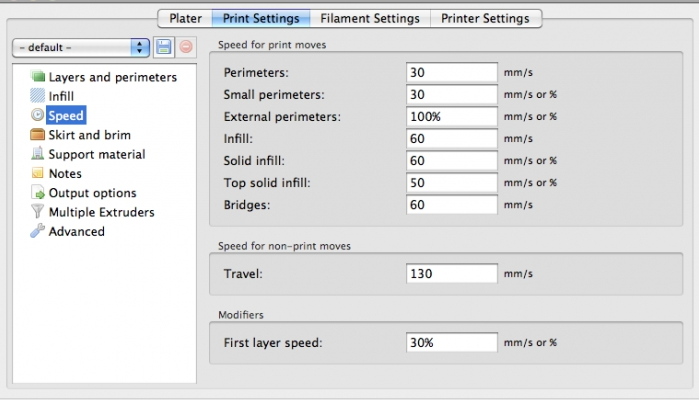
Above, you can see that another group of parameters is speed. With this selection, Slic3r adjusts the extrusion speed according to other parameters specified by the user.
Filament Settings
Filament settings are used less frequently. One reason for their use could be a new filament spool for example. The software will fill in the values in the filament settings. However, you have the possibility to adapt or update them. The values relate to the setting of diameter, flow rate and temperature. In addition, you have the possibility to enter some optional information about yarn density and yarn cost. In this way, Slic3r can help calculate the weight and cost of manufacture.
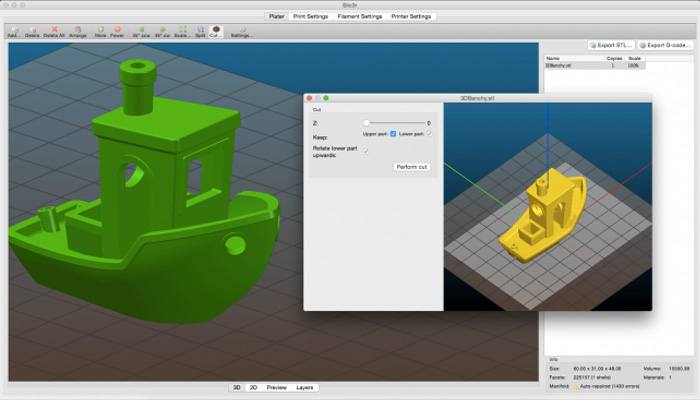
Photo Credit: Slic3r
Print Settings
Print settings require the least adjustments, unless Slic3r is being used on multiple printers. Slic3r is compatible with dual extrusion 3D printers. This is useful if for example parts of a model need to be printed in different colours or with different materials. To inform Slic3r of the correct positioning of the extruders, a combination of printer parameters must be set. The user is also able to set USB printing under these settings. It is also possible to establish remote connection and printing via the cloud using systems such as Octoprint or Duet.
Conclusion
Slic3r is software for all levels. An experienced person can also make even more specific and advanced adjustments. Another great advantage is that the software is free, totally open-source and compatible with several 3D printers. It also allows you to preview the printout and get a real-time preview. Unfortunately, a disadvantage is that Slic3r cannot yet calculate the printing time. If you compare it to Cura, which also provides a free and open-source slicing software, many users agree that the regular updates and upgrades to Cura make it a more desirable slicer. Nevertheless, Slic3r is still a good option for setting up 3D print jobs.
What do you think of Slic3r? Have you ever used this slicer? You can find more information HERE. Let us know in a comment below or on our Facebook and Twitter pages what you think! Don’t forget to sign up for our free weekly Newsletter, with all the latest news in 3D printing delivered straight to your inbox!